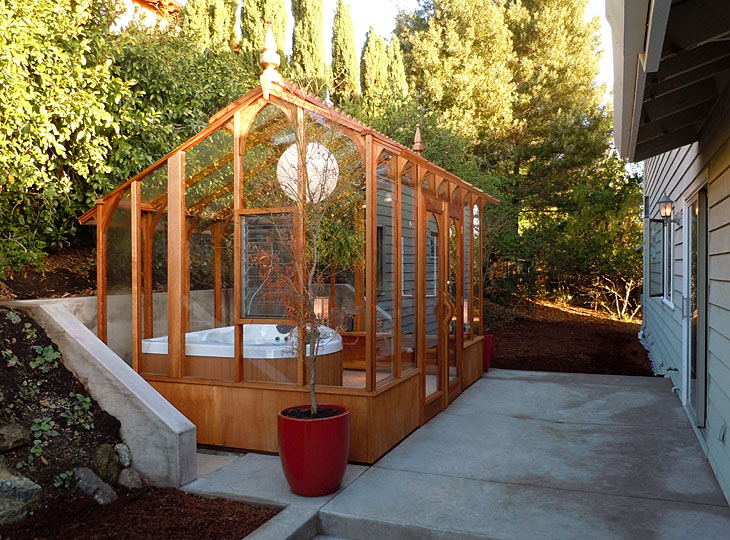
THE BUILDING
Here it is, in our back yard. The location of the solarium is completely secluded, without a neighbor in sight (or vice
versa) in any direction.
The solarium is a build-it-yourself greenhouse kit from Sturdi-Built
in Portland, constructed from clear heart redwood. We chose the 8' x 12' free-standing
Nantucket model. It's their smallest free-standing design and it's the perfect size for a hot tub solarium.
You can assemble it yourself, or have someone do it for you. We hired Barry Chandler, an
excellent contractor (and friend and dance student). If you're in the Bay Area, we can't
recommend Barry highly enough. He's great. (e-mail: bearco11@gmail.com)
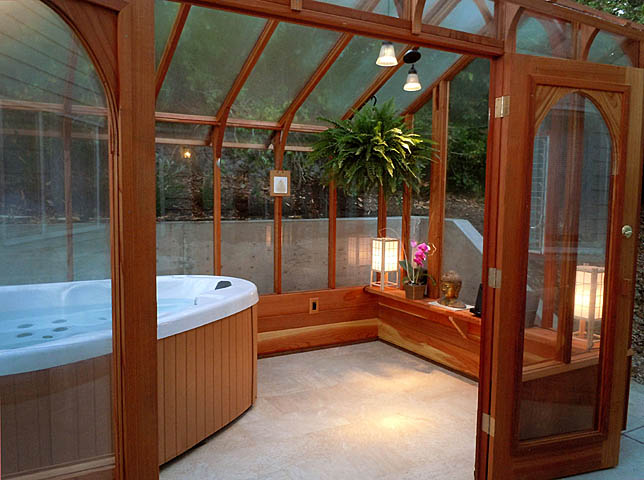
● The Sturdi-Built kit is meant to be a greenhouse, so the inside finish of the 18" high base wall is simply the exposed 2x4
framework, which you can see in the photo at the bottom of this page. Barry made an interior base wall with solid
redwood boards, seen in the photo above. It was quick and easy. The two power outlets are mounted to
this interior wall, as is the main light switch. It's easy to reach down to turn the lights on or off,
and the low switch mounted in the base wall is a cleaner design than bringing a metal electrical
conduit up the side of the entrance door, for a standard-height light switch.
● The kit comes with a second supplementary overhead support beam, running down the length of the building, to support
the weight of snow in the winter. You can see the notch where this beam is supposed to go, at the top of the vertical support, just
to the right of the hanging lights. But we don't get snow accumulation, so we re-purposed that beam
as a low shelf at one end of the room. This is the perfect size for two Japanese paper lamps and
an iPod sound system. And there's more space there if you need it, for flowers or other things.
The iPod player on the shelf is usually playing a Pandora channel (the room gets wi-fi). If you like the quintessential spa sound, Pandora's Ambient
channel is perfect, but we also love their Baroque channel.
● Then mount some hooks to hang towels and clothes. The building doesn't need many modifications. If you want to cover all possibilities, you can
see if your local building code requires the side glass panels to be tempered glass (the roof glass is already tempered). The reason
is that if someone is running and slips and crashes through the glass, it should be tempered. But the same bizarre possibility
exists with greenhouses, which don't use tempered glass, so we didn't bother with it, and ours passed the building inspector just fine. We don't run in the solarium.
FOUNDATION
The greenhouse just needs a concrete slab. The kit provides the dimensions and details.
We decided to extend the slab to the house, so we can walk straight out the sliding door (that was already
there) into the solarium without tracking dirt into the tub room. We also had the exposed part of the
concrete slab dyed and stamped with a slate texture, to look more like rock than concrete, as you can see in the photo below.
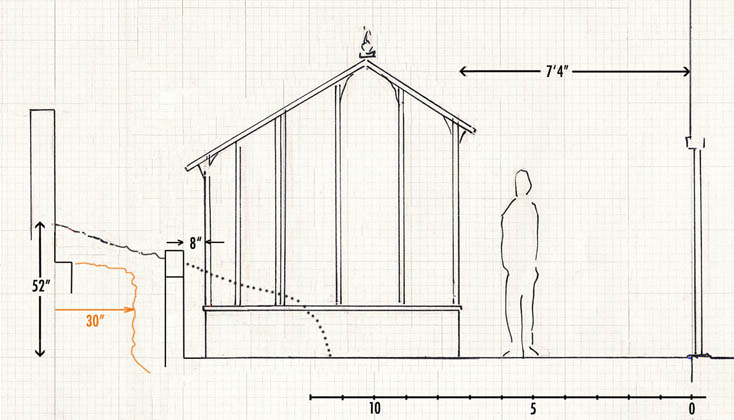
Our situation was complicated by living on a hillside, so our slab needed a retaining wall behind it,
and steps off to the side. Yours will probably be simpler.
We opted to cover the tub room floor with stone tiles. It's much prettier than concrete and feels better on
bare feet. If you really want to splurge, you could make that a heated floor.
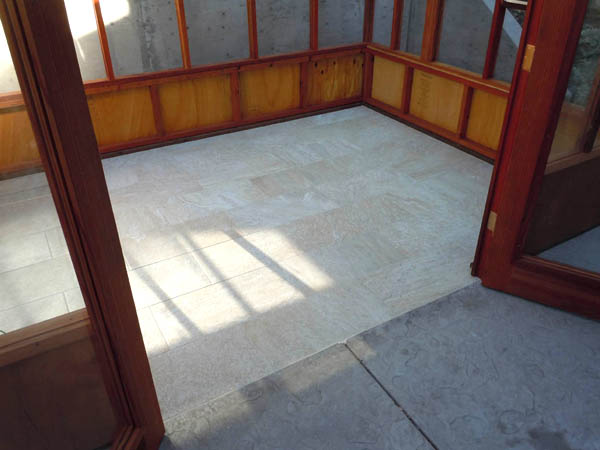
Here you can see the dyed and stamped concrete texture, outside the door. And this is what the interior base wall would look
like without the added redwood paneling.
ELECTRICAL
The two wiring conduits are integrated into the concrete slab, which is easy for a contractor to do. One line goes
directly to the hot tub, for the pumps and light. It needs its own kill switch. This conduit comes up
out of the center of the floor into the bottom of the hot tub, out of sight.
The second line is for the room's lighting and outlets. That has a two-switch system, one to turn on
the lights from inside our house, and another switch in the room itself, with a dimmer.
You can see from the evening photo above that we hung three lights from the roof, two hanging floods and a Japanese lantern. Those
are on the dimmer. Then we split that circuit off into an unswitched line for two wall-mounted power
outlets, for the iPod player and any future needs.
WATER
The simplest approach is the best. Since the tub is already outside, just fill it with a garden hose,
and drain it by siphoning with the same hose. Or the tub has an output valve. It's easy, and you
don't have to do this very often. We found that the floor doesn't need a drain. We just towel
the floor off once in a while.
THE TUB
After much research we chose a California Cooperage
tub. We chose their triangular two-person Model 102 and
are very happy with it. If you prefer a party-sized tub, several of their larger models will still
fit in the 8x12 Nantucket, but we like the somewhat spacious room with the smaller tub.
We bought the tub from Aqua Spas & Hot Tubs in San Carlos, a wonderful
family-run store. If you're in the Bay Area, we highly recommend them.
Layout: We recommend leaving a 10" space between the tub and the rear wall, as shown below. The tub is covered when not in use,
to retain the heat. Then you'll need to store the cover somewhere when you use the tub. The cover folds in half
and fits into that 10" gap.

This was a fun project to work on, and it turned out even better than we imagined. We use it every day,
usually twice a day. It's a great way to start the day, relaxed and centered, and the perfect way to wind down at night.